Aioli Recipe for Sandwiches
Highlighted under: Comfort Desserts
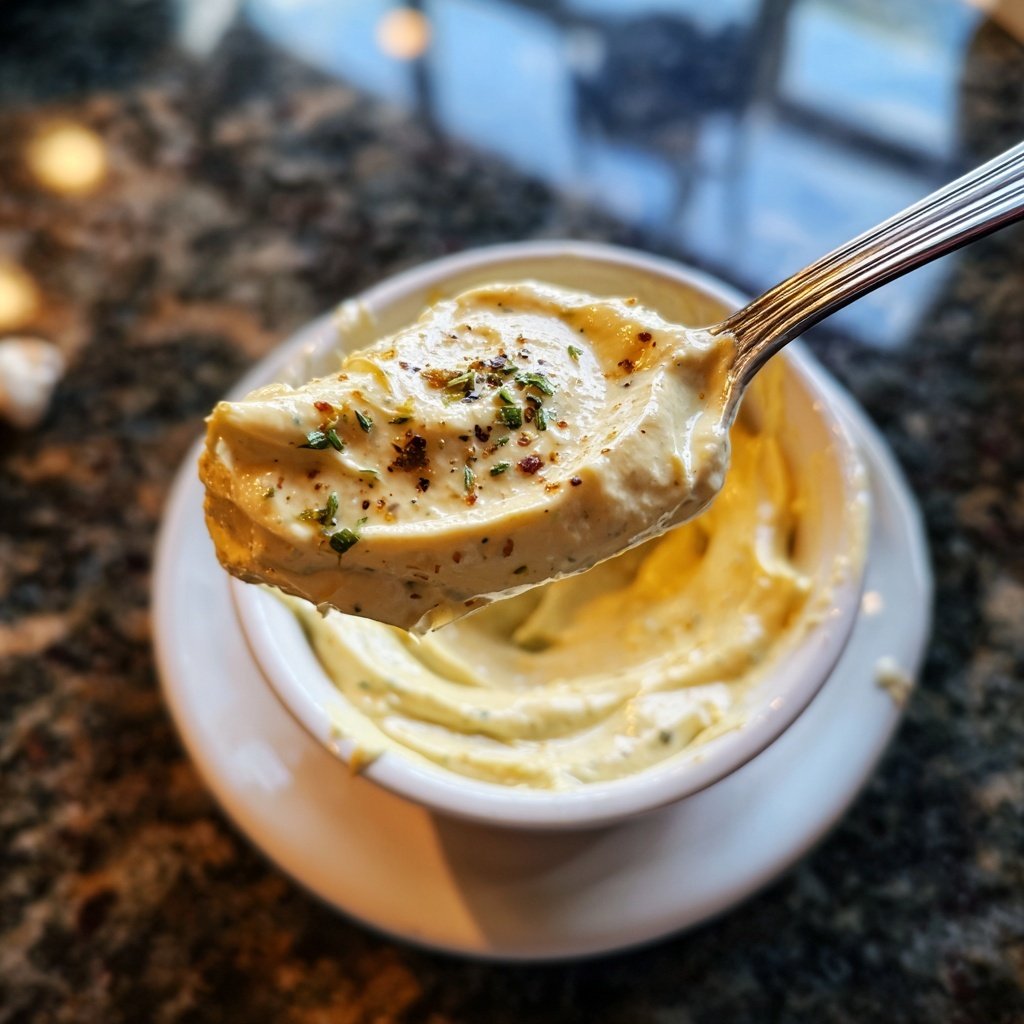
I absolutely love making my own aioli for sandwiches! It adds such a burst of flavor and creaminess that elevates even the simplest ingredients. With just a few basic elements like garlic, egg yolk, and olive oil, I can whip up a delicious dipping sauce or spread in under 10 minutes. This homemade aioli has become a staple in my kitchen and a surefire hit whenever I serve it. Trust me, once you try this recipe, you’ll never want to go back to store-bought again.
Making aioli at home has opened up a whole new world of flavor for me. I remember the first time I created this creamy garlic concoction—simple yet so rewarding. The key is to whisk the garlic and egg yolk together until they form a nice emulsion before gradually adding the olive oil. This technique ensures a velvety texture, which is perfect for spreading on sandwiches.
Experimenting with different flavors was an eye-opener as well. By adding lemon juice or herbs, I found new dimensions of taste that perfectly complemented my favorite sandwiches. This versatility is what makes my homemade aioli a go-to in my kitchen!
Why You'll Love This Aioli
- Creamy and rich texture that enhances any sandwich
- Fresh garlic flavor that can be customized with herbs or lemon
- Quick and easy to make, taking just minutes!
Understanding Aioli's Texture and Emulsion
One of the key aspects of making aioli is achieving the right emulsion. Start by whisking the egg yolk and garlic until the mixture becomes smooth and slightly pale. This initial step is crucial as the egg yolk acts as an emulsifying agent, helping the oil to blend into the mixture without separating. If the aioli appears too thin, it may not have emulsified properly; simply whisk in more oil gradually until the desired thickness is reached.
As you slowly drizzle in the olive oil, it's important to maintain a steady whisking motion. This ensures that the oil incorporates evenly and prevents the aioli from breaking. When finished, the aioli should have a glossy appearance and a thickness similar to that of mayonnaise. If your mixture breaks and separates, you can rescue it by whisking an additional egg yolk in a clean bowl and slowly incorporating the broken aioli in, drop by drop.
Customizing Your Aioli
The beauty of aioli lies in its versatility. While the basic version is delicious on its own, you can easily customize it by adding fresh herbs or alternate spices. For a fresh twist, consider mixing in chopped basil, dill, or parsley. Just a tablespoon of finely chopped herbs will add a burst of flavor, making it a perfect complement for roasted vegetables or grilled meats. If you're a fan of heat, a pinch of cayenne pepper or a drizzle of hot sauce will enhance the flavor profile delightfully.
Another great variation is to replace the lemon juice with balsamic vinegar or apple cider vinegar for a different tang. You can also experiment with roasted garlic instead of raw for a sweeter, milder taste. Just roast the garlic cloves in a 400-degree Fahrenheit oven until they're soft and golden, then mash them into your aioli for a rich, deep flavor. These tweaks help keep your aioli exciting and suitable for various sandwiches and dishes.
Ingredients
For the Aioli
- 2 garlic cloves
- 1 egg yolk
- 1 cup olive oil
- 1 tablespoon lemon juice
- Salt to taste
Instructions
Prepare the Ingredients
Start by peeling the garlic and crushing it using a knife or a garlic press. Set it aside.
Make the Aioli
In a bowl, whisk together the crushed garlic and egg yolk until smooth. Slowly drizzle in the olive oil while continuing to whisk vigorously until the mixture emulsifies and thickens. Add lemon juice and salt to taste.

Pro Tips
- Feel free to experiment by adding different herbs, spices, or even a pinch of cayenne pepper for a kick. Homemade aioli stays fresh in the fridge for about 3 days.
Storage and Make-Ahead Tips
Aioli can be made ahead of time and stored in the refrigerator for up to one week. Be sure to keep it in a tightly sealed container to preserve its freshness and prevent any contamination. If you notice the aioli beginning to separate after being stored, simply whisk it vigorously to restore its emulsion. This can save you from the stress of making a fresh batch before a gathering.
If you're preparing for an event, consider doubling the recipe and freezing half of it for later use. Aioli can be kept in the freezer for about a month. To thaw, simply place it in the refrigerator overnight before you plan to use it. However, be aware that freezing may change the texture slightly, so whisking again before serving may be necessary to regain that creamy consistency.
Serving Suggestions
This aioli shines as a spread on sandwiches, especially those featuring roasted meats or fresh vegetables. Spread a generous layer on your favorite artisan bread before adding fillings to create a flavor-packed bite. Additionally, it can double as a dipping sauce for fries, vegetable sticks, or chips, making it a great addition to any appetizer platter.
For a more gourmet touch, consider serving aioli alongside grilled seafood or as a condiment for a charcuterie board. Its creamy consistency and garlic flavor pair beautifully with smoked salmon or grilled shrimp. I often use it as a dip for my grilled vegetable skewers, enhancing the experience with a touch of homemade elegance.
Questions About Recipes
→ Can I make aioli without raw eggs?
Yes, you can use pasteurized egg products or try egg-free mayonnaises as substitutes.
→ What can I use aioli for?
Aioli is fantastic on sandwiches, as a dip for vegetables, or even drizzled over grilled meats.
→ How long does homemade aioli last?
Homemade aioli can be stored in the refrigerator for up to 3 days.
→ Can I make it in advance?
Absolutely! Just prepare the aioli and store it in an airtight container until you’re ready to use it.
Aioli Recipe for Sandwiches
Created by: Clara Jennings
Recipe Type: Comfort Desserts
Skill Level: Beginner
Final Quantity: 1 cup
What You'll Need
For the Aioli
- 2 garlic cloves
- 1 egg yolk
- 1 cup olive oil
- 1 tablespoon lemon juice
- Salt to taste
How-To Steps
Start by peeling the garlic and crushing it using a knife or a garlic press. Set it aside.
In a bowl, whisk together the crushed garlic and egg yolk until smooth. Slowly drizzle in the olive oil while continuing to whisk vigorously until the mixture emulsifies and thickens. Add lemon juice and salt to taste.
Extra Tips
- Feel free to experiment by adding different herbs, spices, or even a pinch of cayenne pepper for a kick. Homemade aioli stays fresh in the fridge for about 3 days.
Nutritional Breakdown (Per Serving)
- Calories: 150 kcal
- Total Fat: 16g
- Saturated Fat: 2g
- Cholesterol: 37mg
- Sodium: 78mg
- Total Carbohydrates: 1g
- Dietary Fiber: 0g
- Sugars: 0g
- Protein: 1g